
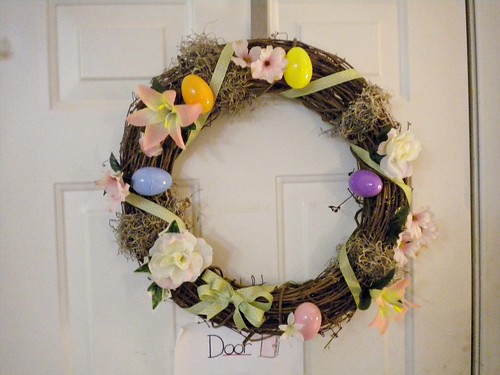
But today, I came across a grapevine wreath at Walmart for only $3.50! And I was inspired. A variation of the original wreath I had in mind, and some of these variable wreaths I've seen some of the other bloggers do, with the ability to change up the wreath for the season and holiday. BRILLIANT.
So I brought home the wreath, grabbed some spare fabric that's about the same color as the moss, some floral wire, some silk flowers I had left over from a trip to the Dollar Tree, some ribbon, the Spanish moss, and some plastic eggs from the Dollar Tree, and had at it!
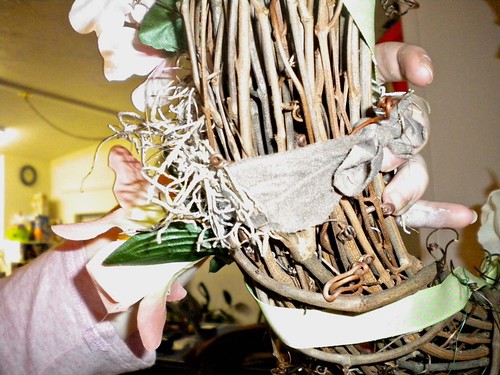
I didn't take any pictures of the process, but the wreath was originally just a bare vine wreath. I cut out strips from the fabric and literally tied them around the wreath and cut the excess fabric. Using my hot glue gun, I glued the moss to the fabric so that I could easily remove it later with less mess.
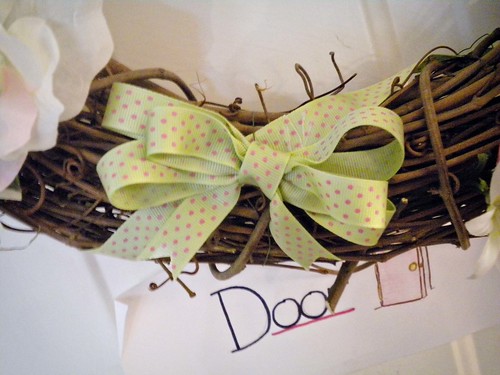
Then I wound the ribbon around the wreath and glued the ends together. I made the bow using ribbon and floral wire and then secured it to the other ribbon with hot glue and kept it more firmly in place with more wire.
I tucked the flowers into place without really securing them -- though I may go back and do that later -- and the eggs had holes in them, so I just stuck the wire through the holes, wrapped it around the wreath, and voila!
The finished product:
The bow:
The back, showing the fabric tied around (holy camera flash, Batman!):
There's paint all over my fingers, I'm in the middle of repainting my pantry -- it's just a simple particleboard, two-door pantry, but I'm tired of it, so I'm changing it. (So many craft blogs inspire me!) Also, yes, haha, the door is labeled "Door". I labeled several items around my house to encourage my son to read. Yay for creativity!
Honestly, compared to so many other projects I see, it's not great, but it's my first real project, so I wanted to share! So, I posted this at:


Congrats on your first project! And I love the "Door" sign! We've been making flashcards with words from Otto's favorite books, kinda like that, to help him read along. Yay for creativity!
ReplyDeleteVery cute... Your blog is super cute and you will have it booming in no time! Mine is pretty new too ;)
ReplyDeleteCant wait to see more projects!
♥, Tara
Please Visit Me Back @ FabuLESSly Crafty!
First, I just LOVE that you're labeling things for your son to read! Second, I love that you saw something you liked and made your own version of it. It's very spring-y.
ReplyDeleteThat wreath turned out GREAT! Take some pics of your pantry for the blog too!!
ReplyDelete