Thursday, March 31, 2011

Spring projects

I've been trying to come up with some projects that I can do with what I have.  I have so many odds and ends, and not a whole lot of room to store them, and not much money to buy new things, so I wanted to see what I could do.

I was reorganizing my bookshelves in my living room and found that I had a large empty spot when I was done, so I found an old candelabra that Mr Mojo had given to me a few years ago, and then I scrounged up some eggs that I had left over from other projects -- I don't have any primer spray paint, so they got left the way they were -- and some Spanish moss that I also had, and put the two together.  A little bit of hot glue to form the nest shapes around the eggs.  They aren't glued to the candelabra though.

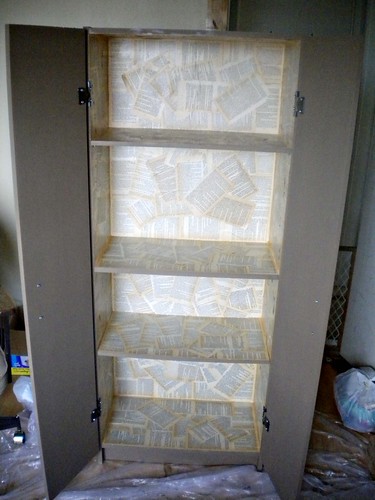
And then, I still had a LOT of book pages left over from my pantry project, and lots of cardboard, so I cut out a wreath shape from the cardboard -- you don't need a foam wreath form after all! -- and using a lot of hot glue, I attached the pages to the shape.  Then using some spray paint, I gave it a bit more color, and then glued ribbon to the back.

Altogether, I had all of the parts I needed for the projects, so both ones cost me nothing.  Yay!


I linked!
Designer Garden

My trip to Salt Lake

I don't really like going so long between blog posts, but I promise, it was for a good reason!  I spent the last week down in the Salt Lake area attending a conference for special needs advocacy, and it was AMAZING.

And of course, because I was in the area, I went and visited Temple Square.


One of my favorite parts was visiting the Church History Museum.  I had gone with a couple of my cousins and their kids, who really enjoyed playing up in the new children's area of the museum.  While they did that, I wandered through the other exhibits upstairs.  There were a few paintings that really drew my attention that I would LOVE to have prints of.  I don't know if they're available in the store downstairs because it was Sunday, so it wasn't open.

I just couldn't get over the gorgeous rich colors in this painting.  I wish I'd thought to grab the names of the paintings and the artists so that I could find them more easily.  The photo really doesn't do the actual painting justice.

This one was gorgeous too.  The imagery is breathtaking.

This one is even more incredible in person, there's so much texture in the way it was painted, it's incredible.

This one, I actually had to check that it wasn't a photo.  It's an oil on canvas, and it's amazing.  I sat staring at this one for a while.

It was an amazing trip, and I saw several friends and lots of family while I was down there.  I heard no few amount of times that I should move down there, and maybe someday, I will!

Mojo Mama

Sunday, March 20, 2011

An amazing deal!!

For anybody looking to find some awesome deals for their bedroom, I just wanted to share these awesome finds with you!!

Both of these I found through DealsPl.us and was tickled pink when I saw them, I just had to share them with you guys!

First, a sueded comforter, normally $39.99, on sale for $6.29, and through the DealsPlus website, you can get an additional 10% off and a free shipping code!!

And second, 16 inch rectangular toss pillows, normally $20, on clearance for $1.99!  Through DealsPlus, you can also get a free shipping code!  And there's a variety of different color choices!  Awesome!
If you take advantage of either of these offers, PLEASE, let me know!!  I'd love to know what you think!

Thursday, March 17, 2011

DIY Book Clock


I was inspired today! So, despite Mr Mojo banning me from starting new projects until I finish all my old ones -- hey, most of them were just barely started anyway! -- I picked this up, and it only took me about an hour to do. (Mostly because I'm too stubborn to just go get a different apparatus with a longer stem.) Easy as pie!!

We happened to have a spare copy of Green Eggs and Ham laying around. I don't know why we've kept two copies all this time, but we did. And now one of them has been put to another use!

What you need:
- A kids book, not too thick, definitely hardcover
- An old clock, or clock parts – can be bought fairly inexpensively at a craft store
- A drill
- An Xacto knife
- About an hour

I had a clock that had been given to me, but that I had never used.  I took it apart for the purpose of painting, but found that I was rather more interested in just taking the clock mechanism and putting it somewhere else.  So I took that apart – fairly easy to do with several clocks, though some don’t come apart quite this easily.  I believe this one came from Target.  I also had my spare copy of Green Eggs and Ham available.
bookclock1

Using an old stir stick, I lined it up from corner to corner to help find the approximate middle.  You don’t have to use the middle, I suppose you could go off-center, if you wanted to.
bookclock2

I marked the spot where I wanted the clock to be with a marker, and drilled through the book.  (I’ve seen crafts like this where they removed a few pages first to wallpaper around the book.  If you wanted to do this, I would really recommend doing so before you drill a hole through the book.)  It took me a few drill bits to get the right size for the whole post to stick through the book.  It will all vary depending on your clock mechanism.  Trial and error is okay!
bookclock3

Because the book is thicker than the post on my clock, I stuck the post through the back and traced around the mechanism so that I could cut a hole out the back of the book for the mechanism to sit in, to push the post further up.
bookclock4

Then I cut out the hole using a box cutter.  (Yeah, that’s my left hand… it was a very awkward picture to take, because I am really not left handed, but taking a picture with my left was even harder.)
bookclock5

You may want to clean up the edges a bit, depending on how messy it got.  Lemme tell you, mine got really messy.  BUT, the mechanism fit!
bookclock6  bookclock7

Because I still needed a bit more space to get the post to fit through, I used my Xacto knife to cut some of the pages around the shape in the back.  I probably cut through most of the book, because I apparently have a very stumpy post.  However, if I didn’t do this, the hour hand would not have fit.
bookclock8

Then I used hot glue to keep the mechanism in place, as well as around the pages of the book to keep them from pulling apart.
bookclock9

I added the hands to the clock and drew the main four numbers, and dots for the rest of them.  (I know it’s not a perfect circle… but it’s for my kids’ room, so I don’t know that they’re necessarily going to care… I hope.)
bookclock11

Voila!  Book clock!  Add a battery, and you’re done!  (You may have to add something to the back for it to hang on the wall, or perhaps a way for it to stand on a bookshelf, but that’s really up to you.)

And last, but not least… a video to prove that it works!


I linked up to these parties:


Beyond The Picket Fence Make it Yours @ My Backyard Eden
Transformation Thursday SYS Thurs

Designer Garden VIP Party

Wednesday, March 16, 2011

The pantry project – Finished for now

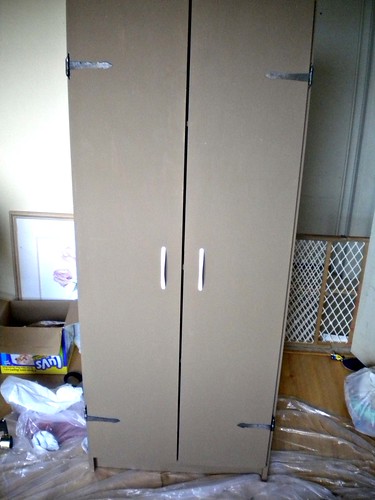
Finally, I have the pantry done.  Altogether, it took me about a week-ish to do.

The only thing left is to get new handles, but I have yet to find handles for it that:
A.) Fit the current holes in the doors.
B.) Are what I’m looking for.

But for now, the rest of the pantry is DONE, and I can finally get it out of my craft room!  Yay!  (My counters have been overloaded in pantry innards for the whole time I’ve been working on this.)  If you missed it, I put up a post yesterday detailing most of the work I did in this project.

pantrydone

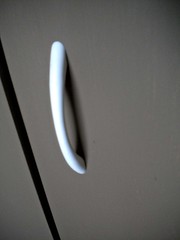
Again, the handles suck… but I don’t have any other handles for it right now.

pantryhandle


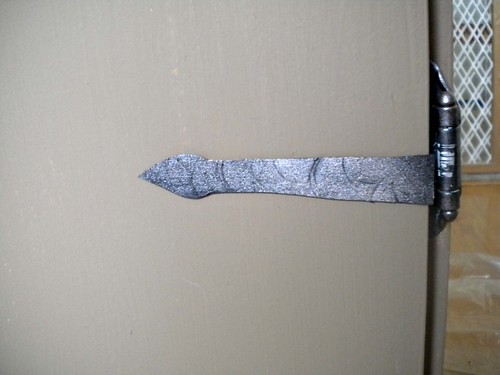
We have the faux antique hinges... the balsa wood painted black, and then spray painted with Krylon's Oil Rubbed Bronze, and then a very light dusting of Sparkling Canyon.

pantryhinge


The scratching on the hinges could probably have been avoided with patience, and I'll probably go back and fix them later.

And finally, the finished product fully opened.

pantryopendone


And here it is, in its place, in use.  Doesn’t it look awesome???  I couldn’t be happier.  (Isn’t it amazing the difference that a different room/light can make on something?  Look how much brighter it all looks in the kitchen than it did in my craft room!  You can see the difference in person as well as in the picture!)

pantryfulldone


I know, compared to so many of the craft projects that I’ve seen SO many other crafters take on, this is kinda sad, but that’s okay!  It’s my first big project, and I’m proud of myself!!  (I’m also sort of wondering if perhaps finding some poly and putting a coat of that over the paint might project the paint from scratching a bit more?)

Total costs for the project:
Caraway Seed paint by Kilz, quart sized - $5 at Walmart (clearance)
Balsa wood - $1.99 at Michaels
Book for the decoupage - $.25 at library bookstore
Total:   $6.24

Everything else, I already had on hand.

I hope you all like it!!


I've linked to:


CreativeShareWednesdays 
http://www.thethriftyhome.com
Make it Yours @ My Backyard Eden NightOwlCrafting
>
”Show and Tell

An exciting find

I’ve been a very casual thrift shopper for a long time, but never really looked at things for their potential much until recently.  And today, I’m THRILLED to say, I found a TREASURE!!

Today being Wednesday, it was 50% off the entire store day at St Vincent de Paul’s.  Normally, I don’t hold my breath as far as anything I might find there is concerned, but as I was wandering around their lot, I found THIS beauty:

antiquewindow

Totally untouched by the rain that we’ve had the last few days, no mold, just a little bit of dust, a bit of dirt… It’s amazing!  The best part?  It was being sold for $20, but with 50% off, I got it for $10.  Oh  yeah… pretty awesome.
The paint is peeling, so I’m going to want to remove that, sand it, and repaint… but beyond that, I have no idea what to do with it yet.  Mr Mojo made me promise not to start any new projects until I finish the pantry at the very least, which I’m hoping I can have done tomorrow at the latest.
Color me tickled pink, purple, and a little bit mauve!

Tuesday, March 15, 2011

Further Into the Pantry Project

(BEWARE: This is a very picture-heavy post!)

For those of you who may recall (because I post SO OFTEN, how could you possibly remember what it is that I posted a whole two posts ago???), I decided to take on the redesigning of my pantry.  I got tired of the OMG IT'S SO WHITE, and felt I needed to repaint it.  Most of my house is all renter's white, and until I own a home, I can't just repaint the walls to fix that, so for now, I paint what is mine to mix things up.

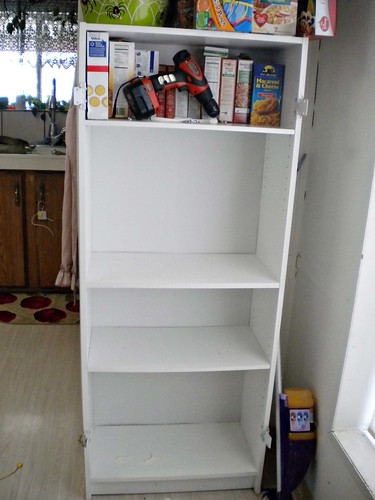
A refresher on what the pantry USED to look like:
The Pantry: Before

Picture it with boring flat white doors and handles, because I forgot to take a picture before I removed the doors.  Whoops.